Monday, May 27, 2013

How Time Flies When You're Having Fun...Quilting!

It's so hard to believe that it's been 3 weeks since I last posted here. After the blog hop earlier this month, I had lots of projects to catch up on, and most were for other people. We also had several birthdays this month and a baby shower, all of which meant quilt projects to make!

My granddaughter, Belle lives far away with her dad and we only see her during the summer and occasionally at Christmas. Belle loves horses, so I made this triple-zip pouch and sent it to her for her birthday.

Here's the back of the pouch. I probably should have made 2 pouches while I was at it. My youngest daughter, Mary also loves horses and when she sees this (she's away at college) I know she's going to want one too!

Belle's younger sister, Lily (who lives next door) also had a birthday this month. She turned 8 and will be getting baptized soon so her mom (my daughter) asked if I would make Lily a bag (to hold the new scriptures she'll be getting) instead of a triple-zip pouch. So I went looking online and found some great patterns by Geta Grama. This is her "Belle" bag pattern which I reduced to 75% and the size was perfect.

And here's Lily, posing with her new bag!

I began taking piano lessons last year and I just love playing and I love my teacher! I'm 7 months older than her and this month was her birthday. I thought she might like a triple-zip pouch too, so I made one with some of the music fabrics I've been collecting. She loved it!

Here's the back. She tried to see if she could recognize any of the music pieces but the only one she could tell for sure was "Moonlight Sonata" which is on the front. I was impressed that she could just look at it and tell what it was!

In addition to all these small projects, I've been doing lots more quilting than usual. My daughter-in-law gave me her "Underground Railroad" top and I loaded it onto my quilt frame last month. After the blog hop, I was finally motivated to get quilting. It was only a twin-size, so it didn't take long to finish. Then one of the church ladies who comes here to quilt finished the top to her Martinsville Rose Quilt (you can see mine in this post). She was here Tuesday night and I had it loaded before she got here. I thought I might have her help with the quilting, but the top was so uneven that I didn't dare let her try. As it was, I was able to get the whole full-size quilt quilted, squared and trimmed by 9:00 that night. She took it home, ready for binding. 

My sister-in-law made this quilt for her daughter who will be going away to college this fall. I guess she had planned to only make a twin-size, but it ended up being a queen! It was so big that she was overwhelmed with the idea of trying to quilt it on her sewing machine and she asked if I would quilt it for her. So I did.On all of these quilts, I only quilted a simple meander or loops. That's the best way to get quilting done quickly and easily.

Early this month I got my "Bloom Bloom Pow" blocks sewn together into a flimsy. The instructions say to cut off the blocks on each end to square it up and finish it. Fortunately before I cut in to it, I found someone who had made the same quilt and instead of cutting off those ends, they had added extra pieces of white fabric between the blocks. I really like how theirs turned out (although it meant sewing Y-seams) and I plan to do that too. In fact, I've got an additional plan up my sleeve, but I'll reveal that once I see how/if it actually turns out!

Laura has also been busy this month. I had some strips I had won that I wasn't that crazy about, so I let her sew them together. But then I was wondering what I should have her do with them and the idea of a tote bag came to me.

She pretty much made the whole bag herself, although I had to give her some assistance on sewing the lining into the bag. She was so cute--when the bag and lining were all sewn together, she thought there was a big mistake because all she could see were the wrong sides of the fabrics!

So I told her, "Watch this, it's magic!" and I turned the bag right side out through an opening in the lining seam. As you can see, she really liked that kind of magic!

Here's her finished bag that she's filled with lots of junk and taken many places already!

My younger son and his wife are expecting their first baby, a boy, the first of July, but their baby shower was this past Saturday. Sabina was decorating the nursery with bright green and teal and with elephants. I had collected fabrics for a quilt for baby Linus over several months and last week I started pulling them together for the quilt. I had looked at different pictures of elephants online, but ended up just drawing my own design and this is what I came up with. There are TWELVE elephants appliqued onto the quilt (it's a LARGE baby quilt!) and I made the mistake of sewing down the bodies before I remembered to add the tails.

This was actually a practice block I made, not one that was part of the quilt. I used a round buttonhole stitch on my sewing machine for the eye and then just freehand stitched a little tail on each elephant. I thought they turned out rather cute...and fortunately my daughter-in-law thinks so too!

Here's the finished quilt. It was a little too wide to use the width of a piece of fabric for the backing, so I had to piece it. I thought I would need to go buy some more fabric but then one of my daughters suggested I use flannel. I have a whole bolt of white flannel and that was the perfect solution.

Phew! This has been quite the long blog post and I apologize. I've really done even more than I've posted about here, but that will have to wait for another day. Meanwhile, I'm going to try and do a better job of posting more regularly...and not writing such long posts!

Wednesday, May 8, 2013

Hummingbirds and Bluebirds

Welcome! Today is the 3rd day of the "It's For the Birds" Blog Hop and this is my day to present my projects. I would first like to extend many thanks to Madame Samm of Sew We Quilt who comes up with all these great blog hops and works tirelessly behind the scenes to make sure they happen successfully. I would also like to thank Mary Winegar of I Piece 2 for being such a wonderful cheerleader for this hop.

It seems like most of us love birds and I'm no exception! My particular favorites are hummingbirds and bluebirds, although I like almost all of them. (We also own chickens, turkeys and guineas, so I like those kinds of birds too, but none of my projects include them!)

We celebrated my mom's 80th birthday this past weekend. I'd already given her a quilt for her birthday, but she also wanted a triple zip pouch. Mom loves to feed hummingbirds and I figured I could kill 2 birds with one stone (ha! no pun intended--I don't really want to kill ANY birds!) so...

I put a paper-pieced hummingbird on the back! This was a pattern from the book, Backyard Bird Quilts by Jodie Davis. I've been wanting to make some of the projects in that book and this seemed to be the perfect opportunity. This particular pattern is rather unique in that the paper-piecing actually includes curves. You stitch the pieces on as you normally would, but then press creases into them when you turn them. I was quite pleased with how it turned out.

When I was considering projects to work on for this hop, I remembered a class I took back in about 2007 from Susan Brittingham called, "Upside-down Applique." At the time, I was rather intimidated by all the free motion stitching and I thought working from the back was confusing. Now that I've done plenty of free motion quilting and lots of paper piecing, I figured it was time to give this project another try. It really is sort of to applique what paper piecing is to piecing. I had just barely started working on this when I took the class and then set it aside for "someday."

Someday finally came when this blog hop was announced, so I pulled the project out of storage and finished it. There are net overlays on the wings and tail, which is one of the reasons for using this particular technique. You can't really tell from the photo, but I used iridescent threads on the wings and tail too. The fabrics I used were the ones that we were originally given when I took the class. I'm a bit a disappointed with some of the lack of contrast, particularly with the hummingbird's bill, but I guess this is just one of those "learning experiences!"

This was another unfinished project that I finally got done. It was a kit I had bought years ago and just never got around to making. It's such a relief to have it completed! I'm not sure if those birds are supposed to be bluebirds, but they look enough like bluebirds to suit me!

Finally, while I had some momentum going with working on bird projects, I decided it was time to make this paper-pieced bluebird that's a free pattern offered on Craftsy and designed by Liljabs. This was another project that I really wanted to make. I noticed that one of the blogs on Tuesday included this same block. It wasn't difficult to make, except for the feet--those are the tiniest pieces that I think I've ever paper pieced! I ran out of time to make it into a project, but I think I'm going to use it to make a cover for my sewing machine.

It wasn't until preparing for this hop that I realized just how many bird patterns and projects I have! There are so many more I would have liked to make, but I guess they'll just have to wait for another hop!

Thanks for coming and visiting today! I enjoyed sharing my birds with you!

Be sure to visit all the other blogs and their wonderful bird projects today too:


Wednesday, April 24, 2013

Shake Your Pom Poms!

Greetings to all! Today is the second day of the "Shake Your Pom Poms" Blog Hop and it's my turn to display my pom pom creations. But first I want to thank Madame Samm from Sew We Quilt for all the work she must go to (that we don't even know about!) to make these blog hops happen and happen successfully. And I also want to thank Thearica from Pig Tales and Quilts for the GREAT cheerleader she's been. She's done a wonderful job of preparing us for this hop and making sure that everything was good to go!

We all know that you can make your own pompoms or you can buy them in bulk or by the yard in long strings. We also know that they come in quite an array of colors. I knew they came in different sizes, but I didn't realize that they also come in little bitty strings! They're SO cute! I knew I had to use them in some way for this blog hop.

My first idea was to make this large hot pad using regular pompoms. As I began working on it, I thought that it might be nice to make matching coasters, using those cute, tiny pompoms. We don't use a tablecloth or placemats on our wooden dining table, so we're always needing something to put underneath hot beverages or hot mugs of soup--these were the perfect choice to go along with the hot pad.

I used this great ruler to cut out the circles--you place the ruler on the fold of the fabric and then place the rotary blade in the size groove you want to cut. (You do have to use a VERY small rotary cutter--18 mm.) I cut 10-inch circles for the hot pad and 4-inch circles for the coasters. I traced circles onto Insul-Bright to use as the batting and then cut those out too.

Originally I had planned to make these reversible, thinking I would sew around the edges, leaving an opening for turning. It quickly became apparent that I would NEVER be able to turn under that curved edge and have it look halfway decent. So instead I cut the back pieces to overlap, with the outer edge turned under about 1/4-inch.

Then I stitched the outside edge in one complete circle. I pinked the edges so they would turn smoothly and turned the whole thing right side out through the overlapped opening in the back.

I was able to sew the larger pompoms onto the hot pad before sewing it together, using a zipper foot. But for the coasters, I used Liquid Stitch and glued the pompoms around the outside finished edge and then topstitched them. To quilt everything, I just drew concentric circles with a Frixion pen and stitched over the lines.

So here's my pompom-trimmed hot pad and coasters! Our large soup mugs fit on them perfectly!

And they can still be reversed (just don't look for the little seam on the back!)

And now for my next project...

I've always wanted to make some of those Kanzashi flowers, so this was another opportunity to try something new. I only made the one flower, but I'm sure I'll be making plenty more. After assembling the flower, I glued a single pompom in the center, surrounded by a ring of those itty bitty pompoms.

My daughter, Laura prefers headbands to barrettes, but this would have worked with either. I hot glued the flower to the headband.

And here's Laura--modeling her new headband! We'll be making lots more of these!

Now be sure to continue hopping along and visiting all the other blogs with their great projects! Here's the schedule for today:


Get More Done...Today--You are here!


And as always, there's still plenty of time to Get More Done...Today! Have a great one!

Paper Piecing Practice

Kristy at Quiet Play is doing a sewing themed, paper-pieced block of the month. The patterns are free for the month she offers them and after that they're available for purchase in her Craftsy shop. I missed January and February, but was so impressed with the blocks that I went ahead and bought them. Then, of course, I had to get them made...and that's what I've been doing.

I believe I've posted a picture of this block before, but this was the March one and the first that I did.

This is the April block. I'm finding that my biggest challenge with paper piecing is trying to be sure that there's enough contrast between different elements. I either should have used a different background here, or else just done something different with the thread spool. But it's not bad.

This was the January block and the easiest one so far. (Kristy is starting with the easier blocks and getting progressively more challenging. There's a picture of the finished quilt on her blog, so you can see what's coming!) Some people who made this block were able to find tape measure fabric to use for the tape measure--or you had the option to just embroider the lines and numbers after sewing the block. I don't have any fabric that would work and I didn't want to have to wait for fabric to be shipped. So I put my thinking cap on and figured--I'll just PRINT a tape measure onto fabric! So that's what I did. I put a tape measure onto the glass of my printer/copier and then just printed a copy onto an inkjet fabric sheet. Then I followed the instructions for how to treat the fabric. Finally, I very carefully sort of fussy cut the tape measure-printed piece into my project. As you can see, it worked out perfectly!

Here's the February block. That's supposed to be a seam ripper, but again, I didn't use fabrics with enough contrast. I looked at it and looked at it and finally decided that I'd just have to make it again.

I'm so much happier with this second block! It's amazing what a difference the correct amount of contrast makes. That's something I'm going to try and watch out for a little better as I'm paper piecing.

As I've been working on these projects, I've been learning more and more about how to paper piece and have the projects turn out the way they should. Number one, of course, is the contrast between the fabrics. Number two is to make sure your fabric pieces are plenty large--you want to make sure they cover their specific section, but also ALL the seam allowances ALL the way around. I'd rather err on having a piece that's a bit too big rather than a bit too small!

When I first learned paper piecing, I was taught to sew my fabric pieces together and then trim the seam allowances, using an add-a-quarter ruler. Then I read Debby Kratovil's book, Paper Piecing Perfect Points. In there, she suggested you trim to the seam allowance of your initial patch and then just line up the next piece with that seam allowance. It works like a charm and you don't need a light box to make your pattern (which is what I was doing before!)

I've also been trying to get caught up with Lee from Freshly Pieced who is doing a quilt-along with the Bloom Bloom Pow quilt. Normally I'm not that interested in modern quilts, but I fell in love with this design when I saw it and decided to follow along. Here's the pile of all my cut strips.

And here, they're sewn together, ready for cutting. Rather an unpromising looking block, isn't it?!

Here's how each initial block is cut up--60-degree triangles! This is so different from anything I've ever done before--and it's lots of fun!
Finally, these are the stacks of each color of block pieces. Don't they look intriguing...and fun?! Tomorrow Lee will be posting the instructions on how they all go together. I can't wait!

Laura was fascinated by all the colored triangles and had to sort them all out for me!

On a different note...I think I posted a picture of this project in its unfinished state back in January. It's finally DONE!! I wasn't sure what to do with it, since I wasn't going to make it into a pillow. Then somewhere, somehow, someone mentioned stretcher bars. So I made a trip to A.C. Moore and found canvas stretcher bars in the sizes I needed. I had to sew an extra border around this piece so I would have something to "stretch" over the wood.

I put a piece of batting behind the fabric piece and then stretched all of it to the back and secured it by stapling with a staple gun. Now it's ready to hang!

Here's a close-up view of the embroidery. The fabric is actually colored with crayons, ironed to remove the waxy coating and then embroidered. The coloring adds such a nice effect, I think.

Tomorrow will be my day (among others) for the "Shake Your Pompoms" Blog Hop--be sure to come back and see what Laura and I have been up to! Until then, there's still plenty of time to Get More Done...Today


Thursday, April 18, 2013

Life on Hold

My last post was last week for the "April Showers" blog hop and about the time my day was over with, I came down with something! At first I just thought I was having a major allergy attack (never have before) but then whatever it was morphed into a REALLY bad cold--the kind where you can hardly keep your eyes open, they're tearing up so badly. And the unfortunate thing is that my loyal sidekick, Laura, came down with it too. She just seems to be bouncing back quicker than I am! I actually was able to do some sewing earlier in the week, but you know you're sick if you don't even want to visit your quilt studio!

I have high hopes that tomorrow will be a better day and regardless, I intend to "act as if"--I've found that when I'm not feeling good, but when I'm not REALLY sick--I can "act as if" I'm feeling okay and eventually, I'm not feeling too bad. So let's hope it works!

Nowadays it seems as if my quilting activity has been simply planning and working on projects for one blog hop after another. Next week will be the "Shake Your Pom Poms" blog hop and then two weeks after that will be the "For the Birds" blog hop. Like some crazy person, I signed up for both! I've decide that for the next while, I'm not going to actively participate in any of the blog hops, but instead, I'll be working on other projects that I've hoped to accomplish. And there are PLENTY of those to keep me busy!

Last Saturday I decided that I would help Laura put together the "Sonoma Swing Bag" that we had bought the pattern for. It looked relatively simple and I thought it might be something she could do. The first part of it was sewing together 2.5-inch strips and Laura's done plenty of that, so no problems there. I cut the pieces, she sewed them and pressed them and I cut some more.

The first challenge came when it was time to quilt the front and back piece. I had ironed the fleece to that section and then found a walking foot for Laura's sewing machine. In the past she's only sewn 1/4-inch seams, but this seemed to be a good opportunity to learn something different. I used those Frixion markers and drew lines for the quilting and showed Laura how to sew on the lines.

She seemed to do okay until she wanted to adjust something--for some reason she doesn't stop, she just keeps sewing as she moves her hands to a different position or makes other adjustments and then she veers WAY off the drawn line. We're going to have to work a bit more on stopping frequently while you sew! Laura had to do a bit of ripping, but she seemed to be okay with that when she saw how far off the line she was--at least she understands that the stitching is SUPPOSED to be on the line!

The other challenge was that she wanted to make the whole thing by herself! Uh, no! In the picture above she's holding the strap after she'd topstitched it. Again, I drew lines and she sewed on them. I hovered quite a bit while she sewed the strap, since a little veering could take her right off the fabric! But she actually did much better.

There's a pocket on the inside and one on the outside and she topstitched those in place too--again with lots of hovering and guidance from Mom! Fortunately, at that point, my husband was ready to go to the airport to pick up our youngest daughter, on break between semesters at BYU-Idaho. Laura was going with him and happy to leave to be able to see her sister again. And I was happy to be able to finish the bag by myself--especially when it came time to install the zipper! I'm not quite ready for Laura to be tackling THAT kind of a task!

Here's the finished bag--the pocket on the front was supposed to coordinate with the center fabrics, but I didn't catch that when I gave it to Laura to sew together. It turned out really cute and it's just the right size to hold her Kindle. And she's so proud of herself for having made it!

While Laura was quilting her bag, I was quilting the cover for my mixer. I discovered that the background fabric (the yellow) wasn't the same as my coordinating wall-hanging, but it's close enough that it doesn't really matter. I paper pieced another apple and centered it on the front of the fabric before I cut it. Overall, I'm really pleased with how it turned out.

I've been doing some other paper-pieced projects and I plan to blog about those in a few days--I've been learning a LOT about paper-piecing as I've done these projects and I intend to share some of what I've discovered. Hopefully my ideas may be of benefit to someone else.

Meanwhile, I've also been busy working on some projects for the Pompom blog hop, so check back here next Thursday when it will be my day for the Hop.

It's late tonight and I'm heading for bed, but there should be plenty of time to "Get More Done...Tomorrow!"

Wednesday, April 10, 2013

April Showers Blog Hop

This has already been such a fun blog hop and there have been so many creative and wonderful mug rugs that everyone has shared. I want to express appreciation to Madame Samm and Erin for bringing this blog hop to us and making it such a success (along with all the other many hops that M. Samm brings us!)

My daughter and her family live next door and for Easter the grandkids all got these cute umbrellas. Fortunately for the kids, it rained that day and they were able to try out their new umbrellas while their Mom took this picture of them. When she showed it to me, I got all excited and had her send it to me--I knew it would be perfect for this blog hop and I knew JUST what I would do with it!

I printed that photo onto fabric and made it into a mug rug! I found some bright umbrella fabric that really seemed to complement the photo.

There are 3 of us in our little family here at home and usually what I do for one, I do for all. So that meant that ONE mug rug was not enough. My next idea was to use Sunbonnet Sue:


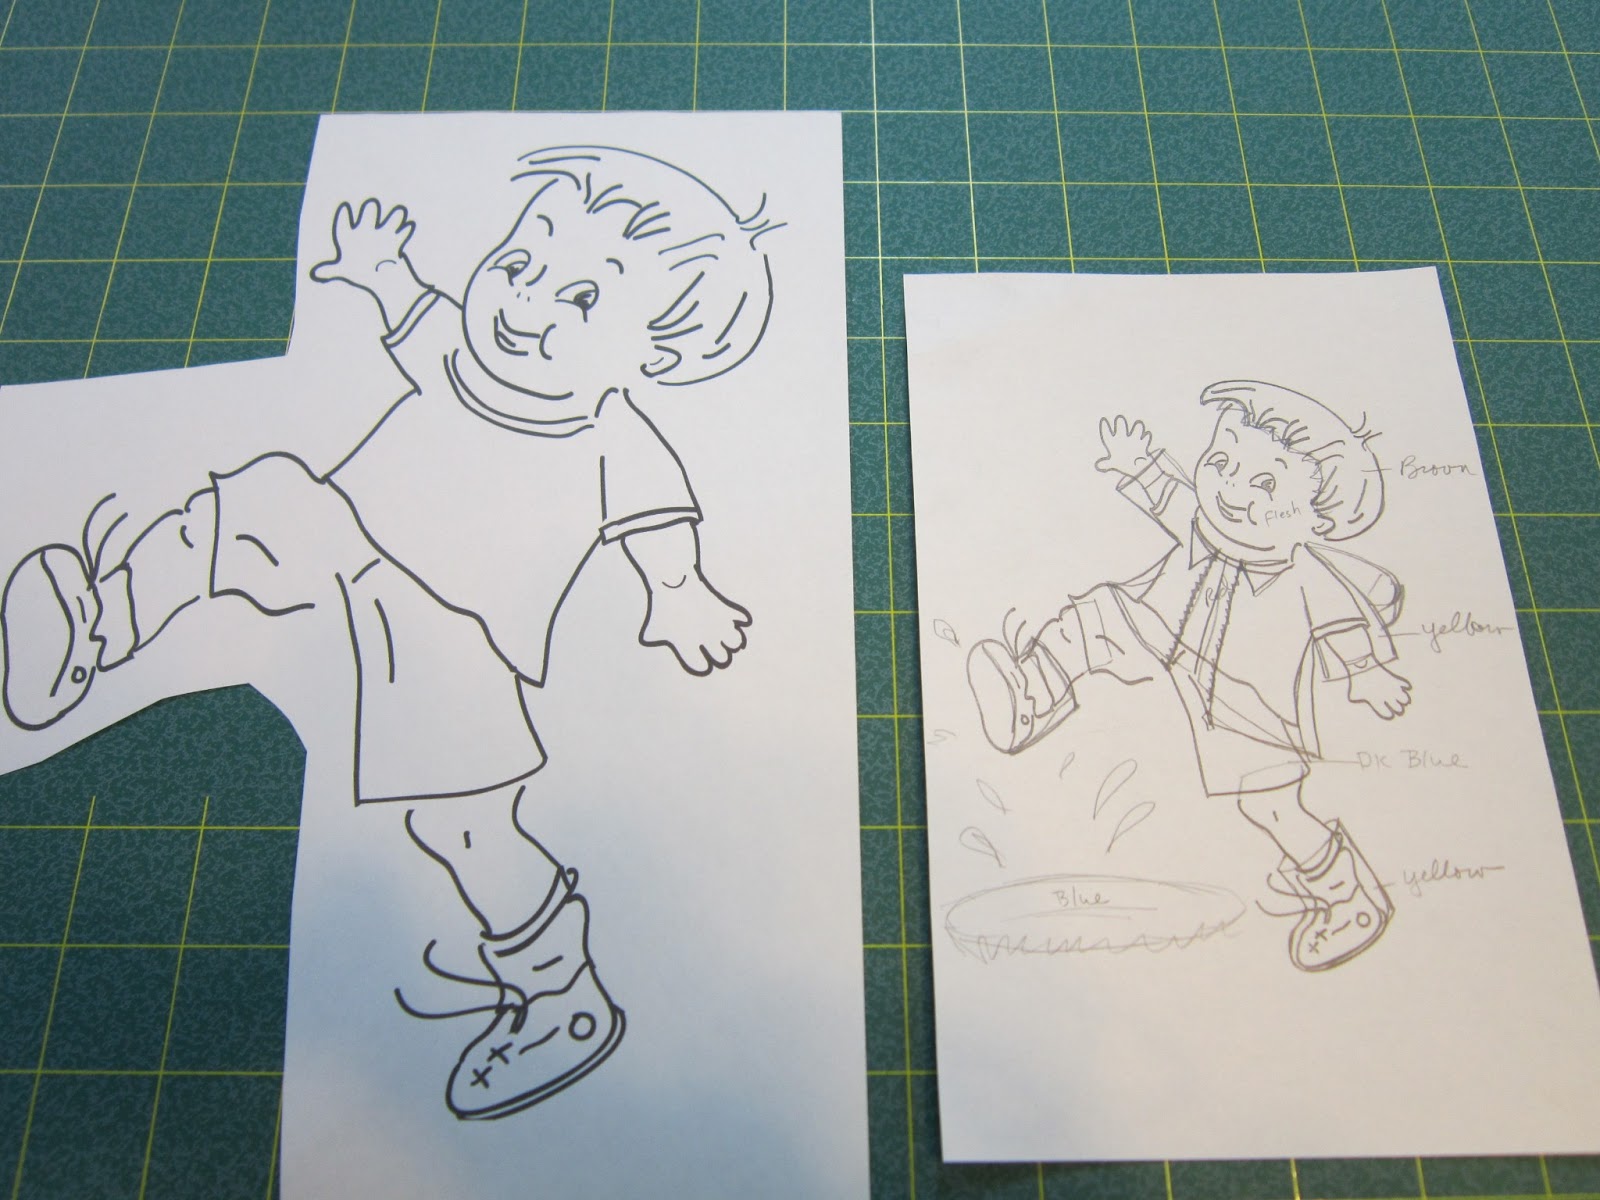
That still left my husband, so I needed to come up with something a bit more masculine. I was wracking my brain and thought that maybe Sunbonnet Sue could use a companion. I had one those "light bulb" moments when I remembered the Wee Tots that Madame Samm drew for the Stitch Me Up Blog Hop. I thought there was a little boy in that collection and there WAS!


I printed this little boy out to his full page size, then reduced him by half. Finally, I added a rain jacket and some boots and made a little appliqued Wee Tot.


Once I had him made, all I had to do was place him into the appropriate background and then I had my husband's mug rug!


I thought I was done with mug rugs for this hop, until I began thinking (dangerous thing to do!) I enjoy sewing when it rains, but what I REALLY like to do is to curl up with a good book! And I have this chair where I like to sit and read (and enjoy the occasional snack) and it would be wonderful to have a mug rug to use on the table next to my chair.

My mind began whirling with ideas and I remembered that Melissa at Happy Quilting had created this wonderful storybook quilt. I wasn't interested in making a whole quilt using books, but this seemed like the perfect starting point for my reading mug rug.


So now I can sit and read and enjoy a nice cup of herb tea and maybe even a bowl of Ladyfinger popcorn!

The forsythia is so bright and beautiful--I thought it made the perfect backdrop for these mug rugs. Isn't it wonderful to have those April showers bringing us such a lovely display of color?!

Be sure to go and visit the other blogs today to see what they've created:

And don't forget to visit Madame Samm's blog each day to find out what other blogs are also hopping with us--all the way through next week until April 18th!

Have a Happy Spring!